
|
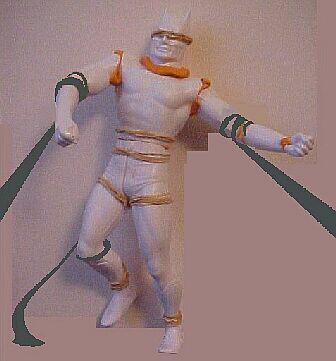
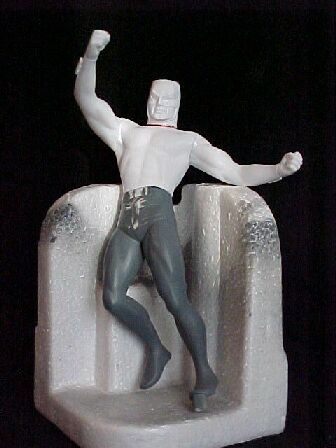
Although Jonny Quest is my all time favorite cartoon, and Beanie & Cecil a close second, I also had a warm spot for our galaxy saving hero, Space Ghost!Saw a nice resin figure at last October's CHILLER, but for some reason didn't pick it up?! But with the re-release of Revell's Superman, Batman and Robin models, we're going to try & see if we can kit-bash together our own Space Ghost! We'll be using Superman's body and Batman's head. So let's open up those boxes and go for it...
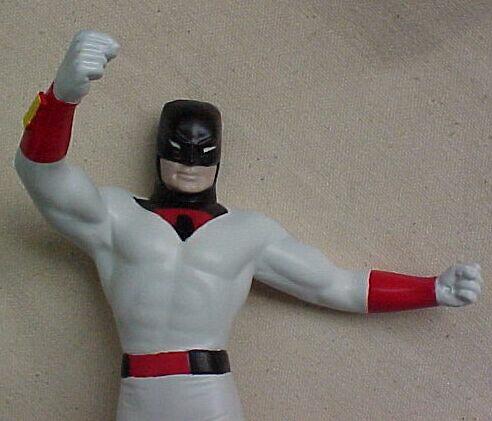
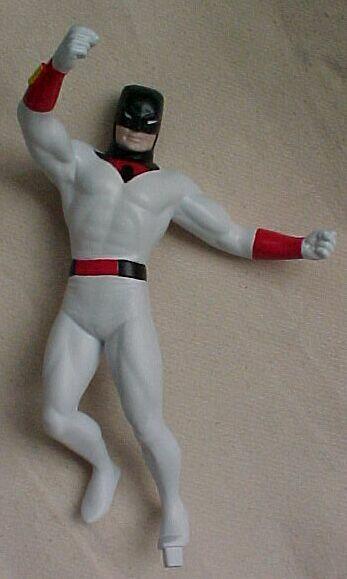
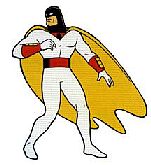
 The first thing I do is search the Internet for good reference photo's of our hero. Since "Space Ghost: Coast to Coast" is such a big hit (although I fail to see the appeal...must be a Generation X thing?!), finding reference photo's is easy!
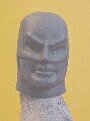
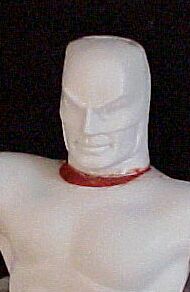
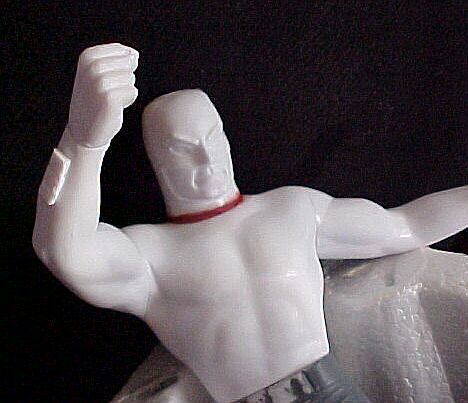
Next, we have to see if the two models are within scale of each other and how well the head will go on the body. So I open up the two boxes, take out Supe's upper torso and Bat's head and check. From chin to torso, Superman has more neck area than Batman. But other than that, Bat's head looks pretty good on the torso. Just have to figure out what to use to build up the gap and should work like a charm!
Clip the two ear pieces off, which when sanded down, leave two small holes.
Okay, I'll be honest with you and tell you that I had to go out and buy another Batman kit!! I had puttied and sanded SO much that I wore the plastic on the top of his head down to nothing!! Less than paper thin!
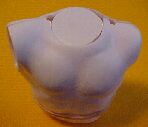
(Anyone need any Batman parts!?!? I have plenty!!!) On the 2nd head attempt, I used my Dremel and sanded down the pointed ears before putting the head together. The holes left weren't as big as the 1st head. GENTLY sanded with fine sandpaper to get it flush with the head. Glued the head together and this time used 'Instant Fix' nail repairer and painted over the holes and let dry. For the open hole on the torso, removed the Superman base from the box and using my crimpers, cut out a plug about the size of a nickel. Glued on to the neck hole, this will allow me a firm platform to build up the neck area.
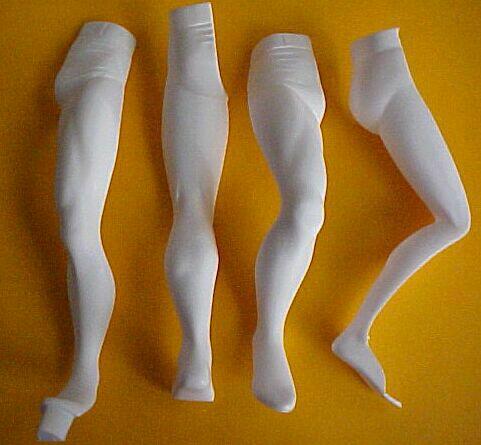
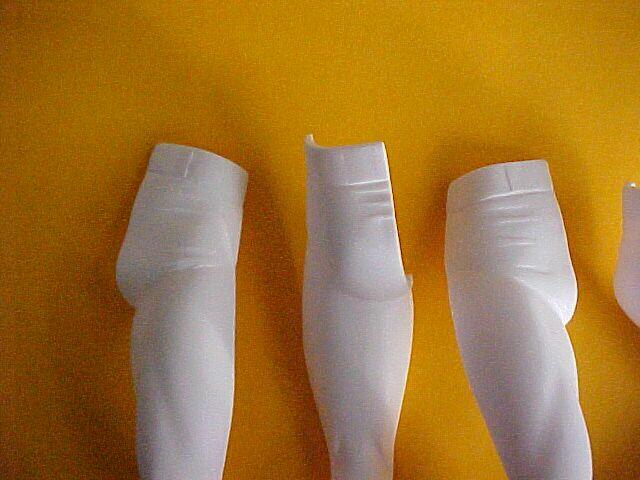
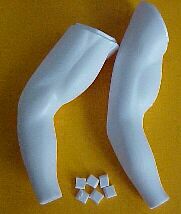
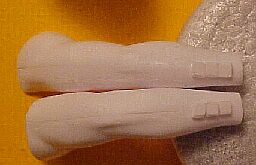
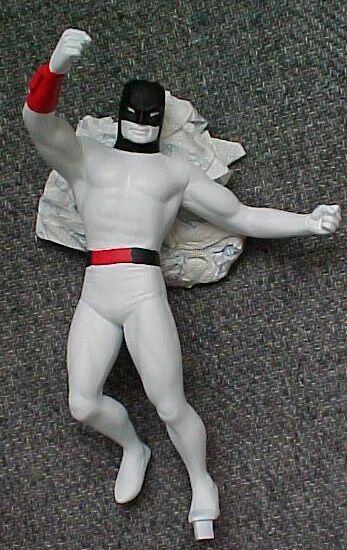
  Taking each leg half in turn, I sand down the pants area to merge more into his legs, since Space Ghost doesn't have briefs. Sand down the round belt buckle and belt loops, leaving the outer edges of the center belt loops alone. This middle area of the belt will be painted red later on. Then sand off the boot tops. I found not putting the legs together, but keeping them just as they come off the sprues, was easier to get these areas sanded down flush. Using the lip of Superman's base, I cut off some of the edge and make up 6 small squares & place three on each arm.
Attach arms to torso, torso to legs. Using BONDO Glazing & Spot Putty, I pour a nice layer onto the circle on top of the torso and smooth out w/ a toothpick. Then place the head snuggly in place. Let dry for 2 hours, then I apply liquid glue around the putty & the head to make sure it's nice and firmly set.
Then spray the whole figure with Primer. Still areas that need more sanding and seam work so start going at those.
Next thing you discover is that only one of the tabs on the cape will fit in the hole, with the other not quite reaching it's slot! I decide to have the left tab in the slot and clip off the right side tab on the cape.
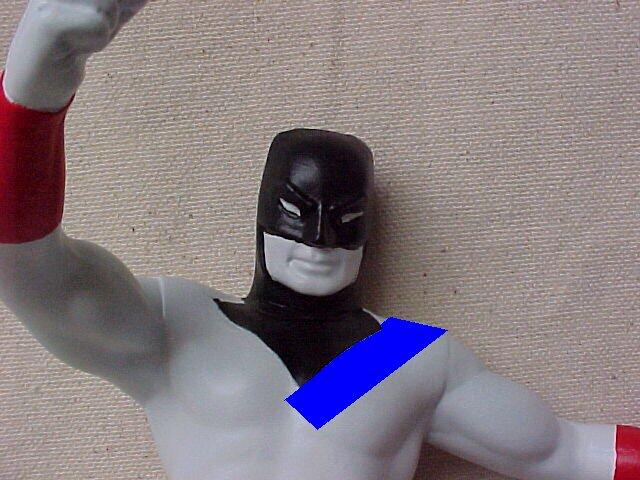
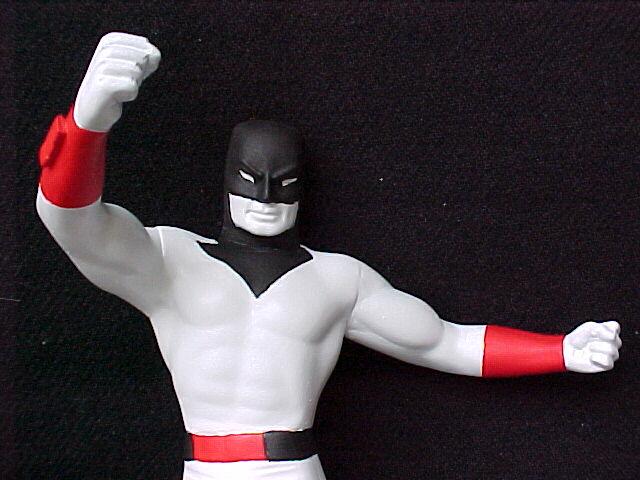
 Paint the buttons on his Arm Bands Yellow and flesh for his face, then a final coating of Satin Clear Protector and the figure will be done.
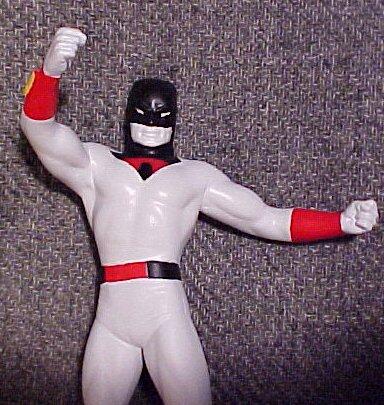   Prime coat the cape and paint yellow. I'm using Krylon's High Gloss Yellow, which is a very transparent paint. Having to do multiple coats to cover the dark grey color of the Primer. Then I'll spray a coat of Clear Protector. Once dry, glue in place! Update: Do NOT prime the cape. I opened the 2nd Superman box and took the white cape out and simply sprayed it with ColorWorks Lemon Yellow (CW01022). Three nice coats covered the white plastic nicely!
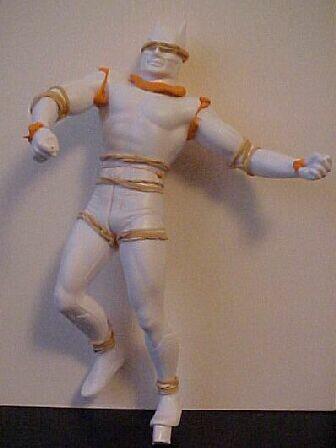
Okay....the easy part is done! Now to work on a base to put Space Ghost on! As I stated above, I want an alien plant creature attacking our Hero! The first stumbling block I have to resolve is how to do the tentacles that will wrap around his arms and legs? Since I'm making the base & alien out of Sculpey, I really don't want to sculpt the tentacles. For one thing, they'll probably break after baking, and how do you approach the portion of the tentacles that actually wrap around his arms/legs? Attempting to wrap Sculpey around his arm and then trying to take a Heat Gun to it will lead to melted Styrene, and I really don't want to go out and buy another Superman! Some ideas I'm kicking around is to go to a large craft store and see if they have something in the Floral department that will do the trick?! Something like thin wire stems that come with dry flowers. Something that you could easily wrap around his arms/legs, and because it's wire inside, will hold its form, and then have the other ends come back to your Sculpey plant and blend it into it's body?
Stay Tuned...
Happy Modeling! - Buc (Jan 00')
|
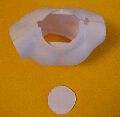
 Each time I puttied over the holes and the putty dried, when sanded further they fell inside the head.
I then tried placing five or six drops of SuperGlue down into the head and let set for awhile. Then took Squadron Green
putty, and filled the inside of the head about 1/4" deep and let that dry.
Each time I puttied over the holes and the putty dried, when sanded further they fell inside the head.
I then tried placing five or six drops of SuperGlue down into the head and let set for awhile. Then took Squadron Green
putty, and filled the inside of the head about 1/4" deep and let that dry.
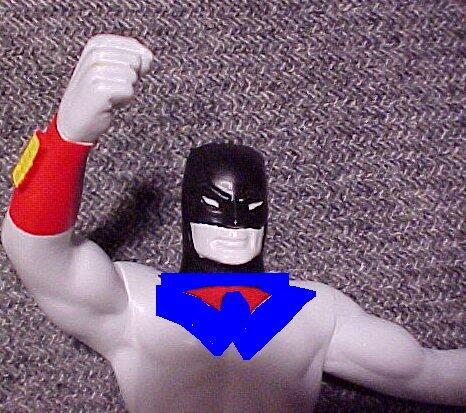
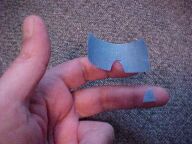 Next cut out a small half circle of masking tape, in scale with the
triangle you just painted and place it at the bottom of the triangle. Again mask off the 'V' shape, and another piece across the top of
the triangle and paint the exposed areas of the triangle Red.
Next cut out a small half circle of masking tape, in scale with the
triangle you just painted and place it at the bottom of the triangle. Again mask off the 'V' shape, and another piece across the top of
the triangle and paint the exposed areas of the triangle Red.