|
So I put my hopes for finding another AURORA Godzilla aside for now, and turned to
the many other Big Lizard models available in our hobby niche.
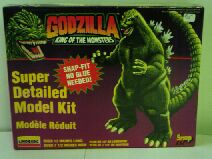
Came upon this LINDBERG snap-tite version on eBay, which was in it's final minutes.
The price was under $14, so threw in a bid and won it.
So let's open the box and start...
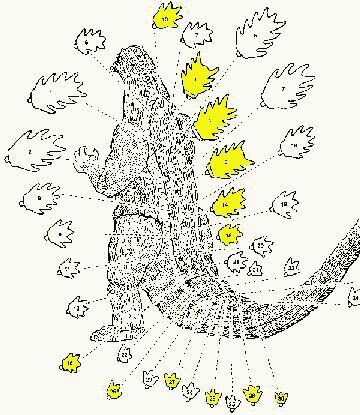
Whoever wrote the opening comments on the instructions, is definately a modeler themselves. Nice to see someone take the time to note dry-brushing techniques, no less, and what parts to hold aside and what parts you can put together prior to the painting stage! If you look on the bottom of the box, there are nice detailed photo's of the finished model and again they describe wash and drybrushing techniques. Good job, Lindberg!! Looking over the instructions, those scales going down his back will be a real challenge!! How, you ask? There are 30 scales...if you must paint them first prior to putting them on our Lizard, that means you have to take them off the sprues. Which means when it comes time to put them on, you no longer have the numbers to go by!! The fact that I'm notorious for doing this all the time, then find myself scratching my head when it comes time to put said piece where it's 'suppose' to go, means I better figure out some system to keep them straight this go around!
The sprues to this model are THICK!! Removed the body, arms, and leg pieces, and start the fun portion of this hobby...sanding! (Not!!!) Believe me...this is a sanding nightmare! What makes it extremely difficult to remove the seams is the texture of his body. Then having to go back and re-scribe the texture lines. Ugh! You probably want to keep the tail seperate while you work on the body. I put the tail on, which is a huge motha..and makes handling the model slightly difficult while you sand and putty the body. Used alot of putty around the arms & legs, the gaps down the back pieces, and where the tail meets the body. Put a coat of KRYLON's Sandable Primer on, after I applied some masking tape to the inside of the mouth. I want an unpainted plastic in there when I go to glue in the mouth pieces. The center seam still shows with the primer coat on, so I continue to try a combination of putty and more sanding to make it go away!! Go back and use an awl and the dull side of my exacto knife to scribe skin lines which were sanded off. Putty a few more areas, and hit it with Primer again.
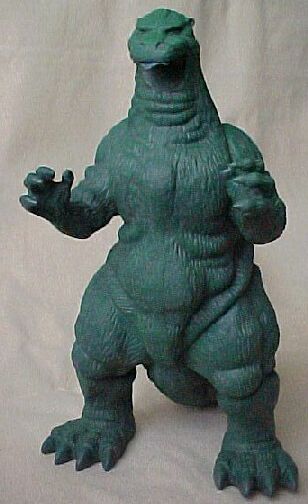
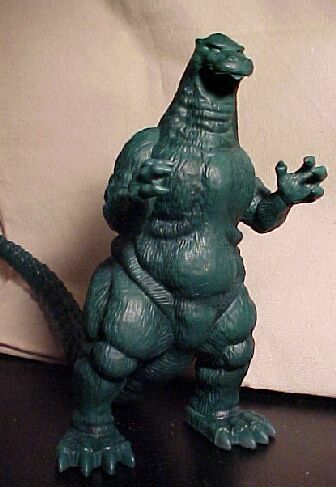
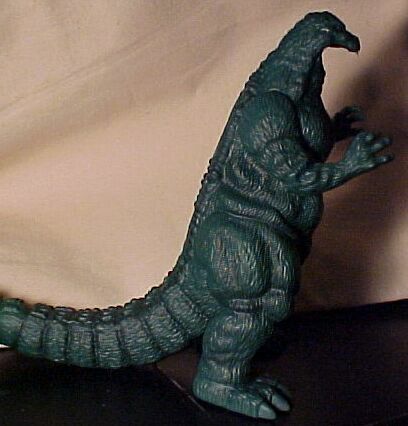
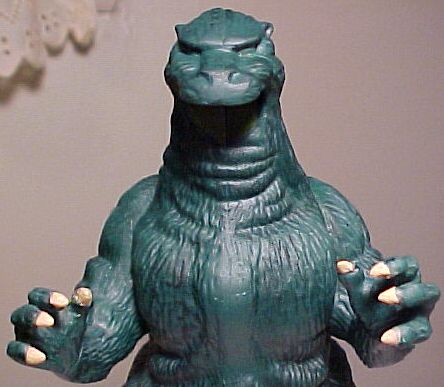
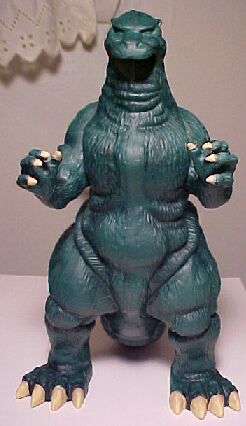
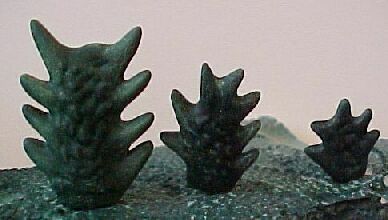
Start off by drybrushing Anita's Fathom Green on top of the Gray Primer. Once dry, drybrush another coat using Palmer's Leaf Green. (photo 1) Then Dullcoate. Next I mix up Liquitex Green & Black & drybrush the shadows of the skin ripples and tail sections. (photo 2 & 3) Just needs some Dullcoat.
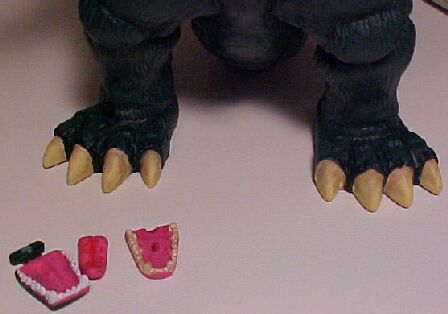
   The claws on his fingers/toes I start off with White. Then make up a light Ivory color and go over them. I take some nice dark Burnt Sienna and a fine brush. Paint the area where the nails begin, with some lines towards the point of the claws. Once dry, using my irovy color again, I go back over with a wash to blend in the darker color some. Take the mouth pieces off the sprue, clean them up and start painting them seperately. A primer coat to start with, then spray a dark green. Use my green/black mix and lightly drybrush so it will be the same color as his body. Make up a light pink and paint the inside mouth. Paint the teeth white and will dirty them up some with a light brown wash...(alot like I did with Kong). Dry brush a darker red lightly over his tongue to bring out the lines. I glued in the top portion first. With the tongue attached, the lower part of the jaw is almost too thick and makes trying to get it forced back to sit well slightly difficult. But play around with it and it will go in. Didn't have the gap problem that Doug refers to. The lower jaw was flush with the body. Only thing I will say is that the lower jaw is too long. If Godzilla were to close his mouth, he would have one hell of an overbite! Brushed glue around the edges and between the back jaw area and it set up strongly.
  For his eyes, found this photo and tried to duplicate it. Started with Anita's Carrot
Orange for background. Once dry, applied a wash of yellow. Black for the pupil, dullcoated, then a followup wash of
orange again. For his eyes, found this photo and tried to duplicate it. Started with Anita's Carrot
Orange for background. Once dry, applied a wash of yellow. Black for the pupil, dullcoated, then a followup wash of
orange again.
I was going to leave them on the sprues and spray them with Primer and the base Green coat, but they needed cleaning up first and it was impossible removing flash while they were on the sprue. So I removed numbers 13, 3, 4, 5, 14 and 15 and cleaned them up. Then using a piece of Styrofoam, placed the 6 scales, inorder, evenly spaced across & primed.
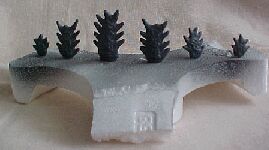 Once dry, spray with my base Green color, dullcoat, then drybrush w/ green/black in the centers. Touch it off by mixing Leaf Green & White, and drybrush the outer portions of the spikes.
 Then continued with #16, 26-30. As you're test fitting the scales to the slot on his back, you might find you get a better fit by trimming off the smallest portion of the pin. On one of the larger scales, had to crimp the plastic off all the way up to the scale itself inorder for it to sit right. Next I started at the top, pulling off the numbers that go on the left and right of the center scale...# 8 & 17, # 1 & 6...etc. Tedious and drawn out, but this way you keep all the scales in order.
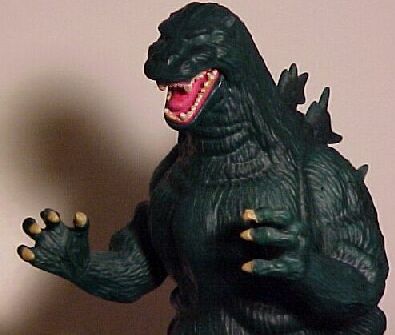
A most impressive Godzilla for a styrene model...and a nice hefty size to it, once that long tail is attached! Biggest drawback is getting rid of the seams...especially down the middle of his chest and alongside his tail. Although I liked the fact that each scale came individually, Doug was right...over 50% of the time spent building Zilla is used on cleaning, painting and applying the scales. But it's good to see him up on the shelf alongside King Kong once again! I'm hoping soon to place Polar Light's new Godzilla and hopefully (fingers crossed) they will even bless us with a reissued Aurora Godzilla! And if we're REALLY good modeler's, maybe Jerry & Mark might have the molds to the other Aurora Godzilla that never got produced!! (One can wish, can't they?!) And this makes the first model finished for good ole' 2000'!!
Happy Modeling! - Buc (Dec '99/Jan '00)
|
 Having searched high and low for another
Godzilla model to build, even willing to settle for a build-up, I've been either
turned off by the prices asked for, or the available models when offered were missing
far to many parts to make it worthwhile.
Having searched high and low for another
Godzilla model to build, even willing to settle for a build-up, I've been either
turned off by the prices asked for, or the available models when offered were missing
far to many parts to make it worthwhile.